The no-fail guide to applying highlighter

Your one-stop shop for the perfect ‘lit-from-within’ glow
Your one-stop shop for the perfect ‘lit-from-within’ glow
We’ve said it before and we’ll say it again: It doesn’t matter how expensive or luxurious the makeup products you own might be, if you don’t know how or where to apply them, you’re not going to get the results you’re after.
One of the products this applies most to is highlighter. After all, if you apply it in the wrong place you’ll end up looking oily rather than glowy, if you don’t blend out the edges you’ll have a shimmery stripe across your cheek, and last but not least, if you choose the wrong colour it’ll leave your complexion ashy and grey.
In order to avoid all of the above and find out the right way to apply your highlighter of choice, we spoke to three of Australia’s leading makeup artists: Makeup Director for L’Oréal Paris Australia, Noni Smith; Sephora Australia National Artistry Lead, Alphie Sadsad; and Australian makeup artist and founder of her very own makeup brush range, Rae Morris.
#1 / How to choose the right colour
Just like choosing the right shade of foundation is essential for creating a seamless and natural-looking finish, so too is using the right highlighter hue for your skin tone. To make sure you pick the perfect colour, Morris suggests testing it out on your collarbone or Cupid’s bow first. “You should see sheen, not colour,” she explains. If the colour appears white or ashy, opt for a darker, more golden, hue or choose a lighter, pearlescent shade if your initial colour is too dark.
#2 / Where to apply your highlighter
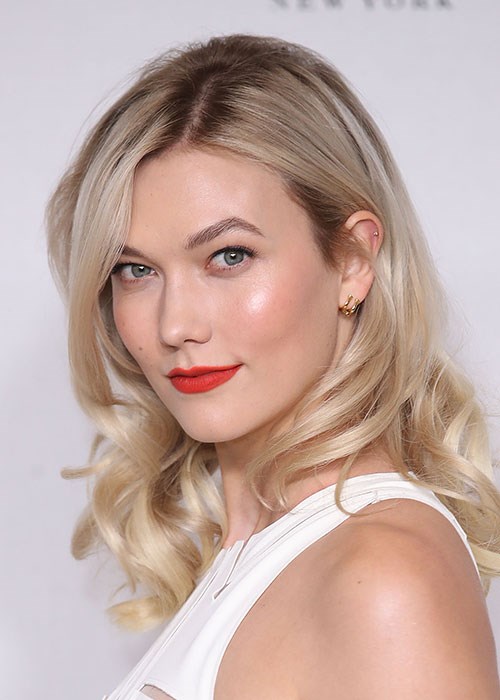
The general rule with highlighter is that it should be applied to the high points of your face or “where the sun hits the face naturally,” says Sadsad. “So, along the cheekbones and the brow bones is basic, extra would be the chin, along the nose, the Cupid’s bow and forehead.”
Morris also notes your application should differ slightly if you have oily skin. “Make sure to keep away from the T-zone and don’t use an all-over highlighter (like an illuminating primer). Only apply your highlighter on the cheekbones and brow bone,” she says.
#3 / The best way to apply each formula
With all the different highlighter formulas on the market (cream, stick, liquid and powder), you would be forgiven for using a one-application-fits-all approach. This is when having a team of experienced makeup artists on speed dial (or their top tips bookmarked) comes in handy!
According to Smith, fingers are the best tools of choice when applying both stick and cream formulas, “as the warmth from your fingers will help blend and spread a more solid product.” If you’re not a fan of using your fingers to apply product, Sadsad suggests wiping your stick highlighter across your skin before bouncing a beautyblender over the top to diffuse any obvious edges.
For a liquid formula, “Pump it on the back of your hand before applying it to your skin using a natural bristle brush. Try not to pick up too much product at first, remember you can always add more later,” says Sadsad.
Lastly, Morris suggests using a fan brush (we love her Jishaku #25 Fan Highlighter Brush) for any powder highlighter application, “as the design makes the product naturally hit the high points of the face, where the light would hit anyway.”
Toolkit: Rae Morris Jishaku #25 Fan Highlighter Brush, beautyblender and Zoeva 105 Luxe Highlight Brush.

Rae Morris Jishaku #25 Fan Highlighter Brush

beautyblender

Zoeva 105 Luxe Highlight Brush
#4 / How much product you need
It might be an age-old adage you’ve heard a million times, but it stills rings true: less really is more. “Highlighter needs to look like it’s in the skin, not on it. It should always look like it’s under foundation and you have a lit-from-within glow. That’s why it’s best to use a shinier highlighter, but less of it,” says Morris.
Toolkit: Chantecaille Liquid Lumiere, BECCA Cosmetics Shimmering Skin Perfector and L’Oréal Paris Infallible Luminising Primer.

Chantecaille Liquid Lumiere

BECCA Cosmetics Shimmering Skin Perfector

L’Oréal Paris Infallible Luminising Primer
#5 / How much blending should you do?
According to Morris, “highlighter is one product you can never blend too much, as it’s meant to give the illusion of light hitting the skin. As a result, it should be the most thoroughly blended product on your face. You shouldn’t be able to see the edges of your highlight so I think it’s actually more important to blend highlighter than eyeshadow!” You heard her folks, get blending!
Struggling to find the perfect highlighter for your fair skin? It might be because you’ve never tried this product before.
What’s your Holy Grail highlighter? Let us know in the comments below.
Image credit: Getty

Kate started working for BEAUTYcrew in early 2016, first as a contributor, and was then named Beauty Writer in 2017. She loves picking the brains of the industry's top experts to get to the bottom of beauty's toughest questions. Bronze eyeshadow palettes are her weakness and she's forever on the hunt for the perfect nude nail polish to suit her fair skin. Her words can also be found in Men's Health magazine, and she now works in PR.


