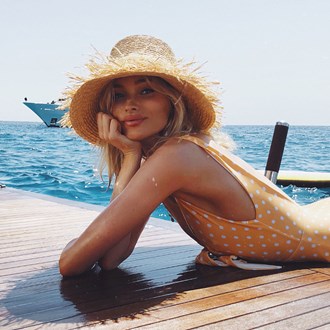
The fine-haired girl’s guide to nailing beachy waves

Get the lowdown on the hairstyle you’ll be rocking all summer
Get the lowdown on the hairstyle you’ll be rocking all summer
If there’s one hairstyle that’s proven to be much more than just a passing trend, it’s beachy waves. Not only does this hairstyle suit all hair types and lengths, it’s also appropriate for a whole host of different social events. But just like ‘no makeup’ makeup, it actually takes some effort to achieve those carefree waves. Add to that the need to use different styling techniques depending on your hair type and you’ll find beachy waves are little bit more complicated than initially thought.
If you have fine hair, you’ll know all about your hair’s knack for sitting flat and looking limp and lifeless – which is not what you want when creating tousled waves. That’s why we’re sharing our tips and tricks for adding oomph, while keeping your style looking natural and textured. As someone with fine hair myself, I’ve spent countless hours styling and re-styling my hair again in a bid to achieve the perfect lived-in, beachy texture. And after much trial and error, I think I’ve got my technique down pat. That’s why I’m sharing the exact steps I follow to nail the beachy wave look below.
The toolkit
For me, I find keeping it simple and using a high-quality hairdryer, curling wand, boar bristle brush and texturising spray does the job really well. For this look, I used the VS Sassoon Intelligent Digital Sensor Hairdryer, Muk Curl Stick (I used the 25mm barrel), Christophe Robin Boar Bristle Detangling Hairbrush and Oribe Dry Texturizing Spray.

1
Roughly blow-dry wet hair
Start by roughly blow-drying your freshly washed hair, making sure to keep the nozzle of the dryer angled down towards your ends. This will keep hair looking smooth and will prevent any unwanted fly-aways. If you have a lot of hair, feel free to split your hair into two sections (top and bottom) to make it easier to dry the underside of your locks.

2
Split hair into small sections
One of the perks of having fine hair is that you can often complete your style in a fraction of the time it takes those with thicker strands. And because I have finer hair than most, I find I only need to split my hair into three sections (bottom, middle and top). Before you start curling, create your bottom section by lifting the top two thirds of your hair and securing out of the way with a clip or elastic.
3
Curl your hair away from your face
Once your curling wand has heated up, wrap small sections of hair around the wand away from your face, before holding for five seconds and releasing. Curling hair away from the face allows your features to shine.

4
Curl the remaining sections of hair
Once you’ve finished curling the bottom section of your hair, simply follow the exact same steps on the middle and top sections.

5
Brush out the waves
The key to nailing beach waves is to keep your look tousled and loose rather than bouncy and glamorous. To do just that, brush your waves out immediately after curling. Brushing through your hair before the curls have set will enable them to drop subtly, which softens your look.

6
Spritz a texturising spray
While fine hair is often easier to manage than thicker strands, it does have a tendency to sit flat and look a little lifeless if you don’t get some help from styling products. That’s why a texturising spray is a fine-haired girl’s best friend. Not only will it muss-up your style, it’ll add much-needed volume to your roots and mid-lengths. Just remember not to go overboard in this step as too much product can weigh your strands down.

The final look
To finish, simply use your fingers to scrunch and mess up your locks to create the perfect dishevelled, beachy texture. And then you’re done! While it might take a bit of practice to perfect, achieving beachy waves on fine hair can, in fact, be done.

Not sure if beachy waves will suit your hair type? These five celebs prove every hair type can nail beach waves.
How do you achieve beachy waves on your own hair? Share your technique with us in the comments below.
Main image credit: Sevak Babakhani
Inset image credit: Sevak Babakhani

Kate started working for BEAUTYcrew in early 2016, first as a contributor, and was then named Beauty Writer in 2017. She loves picking the brains of the industry's top experts to get to the bottom of beauty's toughest questions. Bronze eyeshadow palettes are her weakness and she's forever on the hunt for the perfect nude nail polish to suit her fair skin. Her words can also be found in Men's Health magazine, and she now works in PR.


